Easter Craft – The Easiest Easter Cross

Sharing important spiritual messages with kids can be difficult. I find it much easier and more meaningful when we combine the message with an engaging activity or craft. This is especially true when teaching kids about Easter! One simple yet beautiful way to celebrate Easter is by creating a watercolor resist craft. It’s a fun project that children of all ages can enjoy.
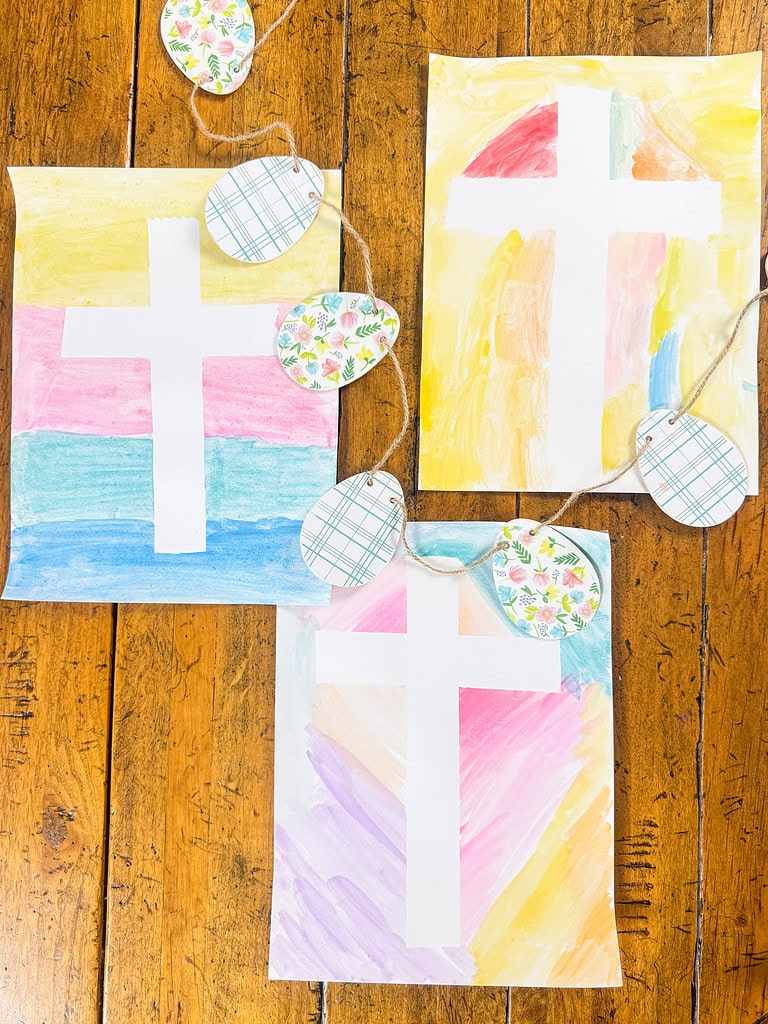
In this easy Easter craft for kids, we’ll be using watercolor paints and painter’s tape to create a simple watercolor cross. It’s a great time to have a conversation with your children about the message of Easter.
This Post Contains Affiliate Links through the Amazon Associates program and other affiliate programs. This means I earn a small commission from purchases made through links on this page.
Easter Craft Supplies
Here are the supplies you need for the craft:

- Watercolor paper: a good quality watercolor paper will hold the paint without warping.
- Watercolors: you can use watercolor paints or watercolor crayons.
- Painter’s tape: this is the key to creating the resist effect. It’s gentle on paper & easy to peel off after the paint is dry.
- Watercolor brushes: a variety of brush sizes will help with painting large areas and finer details.
- Water container: for cleaning brushes and mixing paints.
- Paper towels: to wipe off excess paint or water.
Now you’re all set to create your beautiful Easter-themed watercolor artwork! (You can use these same supplies for this cute Valentine’s Craft or these watercolor snowflakes)
Step by Step Process
Step 1: Prepare the Workspace
Set up a workspace for your little artists. We use newspaper or a disposable tablecloth to protect surfaces from water and paint splashes and to make cleanup a breeze. The kitchen table or island will give everyone enough room to craft in their own space. It would also fun to do this easy Easter craft outside on a warm spring day.
Step 2: Create the Design with Painter’s Tape
For a simple and meaningful design, create a cross that symbolizes the central message of Easter. Press the tape firmly to make sure no paint can seep underneath, as the tape will be the “resist” to the watercolor paints.

Step 3: Prepare the Watercolors
Set up your watercolor paints, and add some water to get the desired consistency. You can mix colors and experiment with different hues. This is the part where kids can get really creative, blending pastel shades for a soft, Easter feel or using vibrant colors to make the piece stand out.
Step 4: Begin Painting
Now it’s time for the fun part! Using the watercolor brushes, let the kids apply the paint to their paper. Encourage them to layer the colors and fill in all the white space so the central cross shape will stand out.

Tip: Make sure to leave the tape-covered areas untouched by paint. This is what will create the resist effect.
Step 5: Let It Dry
Once the artwork is fully painted, set it aside to dry. Drying can take about 30 to 60 minutes depending on how much water was used in the painting. You can speed up the process with a hairdryer on a cool setting, but be careful not to blow the paint around.
Step 6: Peel Off the Painter’s Tape
After the watercolor has dried, it’s time to reveal the resist effect! Gently peel off the painter’s tape to uncover the clean spaces left behind creating beautiful, defined shapes against the watercolor backdrop.

A Beautiful Reminder of the Meaning of Easter
This watercolor resist craft is easy and fun. More importantly it serves as a beautiful reminder of what Easter represents. For older children, consider adding a scripture verse or meaningful Easter quote to the artwork, such as “He is Risen!” or “The Lord has risen indeed” (Luke 24:34).
As your child works on this craft, you can talk as a family about the significance of Easter or read the resurrection story from the bible or the Jesus Storybook Bible. It always reminds me of a quote from beloved pastor Tim Keller, “If the resurrection is true, then everything is going to be alright.”